Guides - Beamable QuickStart
Get up and running with Beamable in 30 minutes or less.
Overview
In this guide you will learn to integrate Beamable in your project in under 30 minutes. We will cover setup steps, installing the SDK, Beamable Authentication, and be able to make API calls into the Stats feature. In addition, we will cover a quick introduction to Beamable Portal.
Setup
There are some setup steps that this guide assumes that you have already followed. One of them is creating a Beamable account, selecting a licensing plan and that you have received an email with the link to download the Beamable SDK.
If you have not followed these steps, please take a moment to complete them now. There is a handy guide called Guides - Getting Started that will assist you.
You should have gotten this link via email, and I’ve provided this for easy access. getting-started-with-beamable-license
SignUp for Beamable Free Account
If you have not signed up for a free Beamable account you can do so from the signup page.
Installation
Supported Unity Versions for Beamable SDK
We currently officially support the LTS versions of Unity.
Installation is very straightforward, download the Unity package from the link provided and import it into any project, blank or not. Although, when using Beamable for the first time it’s always nice to start with a blank project. This section to the Getting Started Guide will get you directly to the installation steps.
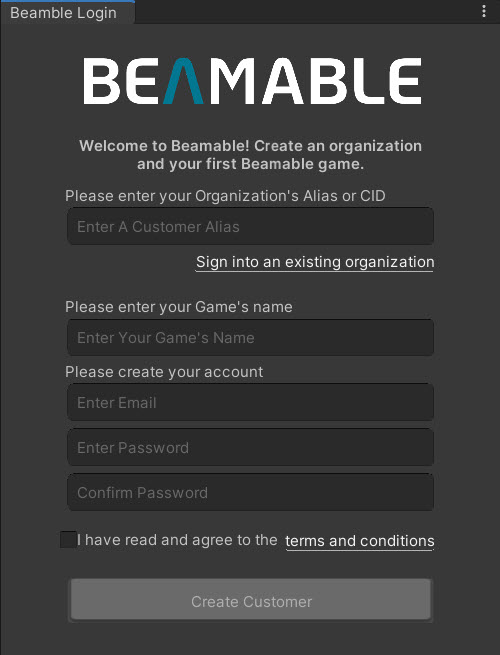
Once the installation is complete, it’s best to get signed into your beamable account. Do this quickly by opening the Toolbox window and the Beamable login prompt should appear.
To open the Toolbox window, select "Unity → Window → Beamable → Open Toolbox".

The Beamable "Login" Window
We are now ready to start integrating Beamable. The toolbox provides a bunch of prefabs that allow you to quickly use “no-code” to play around with, however for this guide, we will use the code and API only to quickly get you started!
Usage - Authentication
The quickest way to start using beamable is through Frictionless (Silent) authentication. There is another guide, Guide - Frictionless Authentication, that will give you more information on that topic, but for now we will move forward with some code.
Step 1: Create a Monobehaviour and attach it to a GameObject in your default starter or startup scene.
Step 2: Add the following declaration at the top of your monobehaviour class.
private IBeamableAPI _beamableAPI;
Import Beamable
Be sure to import Beamable at the top of your file if the IBeamableAPI interface is missing.
Step 3: Initialize the Beamable SDK in your Start() method.
private async void Start(){
	_beamableAPI = await Beamable.API.Instance;
	Debug.Log($”User Id: {_beamableAPI.User.id}”);
}
In the above example we also output the PlayerId ( aka User Id ) of the user that was authenticated. Just initializing the SDK will create a new user / player for you.
Usage - Save Stats
Stats are a common dataset you will want to use in your game. You can learn more about stats here, stats-code, on the Code / Guide page. But in short, you can save small or medium sized pieces of data for your player in Stats. In some ways you can think of Stats as being your Player Profile.
In this example, we are going to set a stat called Rank, and we are going to set it to the value of 1. This signifies that the Player is new and will start from Rank 1.
Below we will add to our start function the SaveDefaultRank() function.
private async void Start(){
	_beamableAPI = await Beamable.API.Instance;
	Debug.Log($”User Id: {_beamableAPI.User.id}”);

	SaveDefaultRank();
}
We need to get the stats, using the GetStats API, first to see if the Rank has already been set. If it has not been set, then we know this is a new user and it’s the first time they have played the game. In this case, we will set the stat value to 1 using the SetStats() API.
private async void SaveDefaultRank(){
	long id = beamableAPI.User.id;
	string access = "public";
	string domain = "client";
	string type = "player";


	//Get the current stats for the user
	Dictionary<string, string> stats = await beamableAPI.StatsService.GetStats(domain, access, type, id);


	if (!stats.ContainsKey("Rank")){
     var statsToSet = new Dictionary<string, string>{
         “Rank” = 1
     };

     await _beamableAPI.StatsService.SetStats(access, statsToSet);
	}
}
The above code will check for a Rank, and if no Rank is present it will then set the default Rank.
Beamable Uses Promises
Virtually all Beamable API’s use Promises. This means you can either use the async / await pattern or the
.Then()method for continuation.
Portal
You are now ready to go! Hit Play and see that it sets the stat. To see that the stat was saved to your Player you need to visit Portal. Portal allows you to do many things, and one of them is to view your Player and all data for that Player. Visit our Portal documentation where you can learn more about portal and what you can do within it. For now, let’s get in and show you how to view the data that you just set.
From the Beamable Toolbox in Unity, click the Open Portal.
Note: To open the Toolbox window, select "Unity → Window → Beamable → Open Toolbox".

Open Portal from the Unity Toolbox
From running the code above you should see the User Id (PlayerId) in your Console

Get PlayerId from Console, and copy to clipboard
You can use this ID to look up your Player in the Beamable Portal. Click on Players and enter the ID.

Search for your PlayerId
Once your Player is loaded, you can scroll down to the Stats section and you should be able to see your Rank stat. You can also search for the Stat by name.

View recently saved stat
Updated 6 months ago
