Installing Beamable (Unity)
1. Setup Unity
Create or open a Unity Project. For new projects, populate the Project Name, Location, and Template in the Unity "Hub" Window.
Press the "Create" button to continue.
Beamable SDK Compatibility• Beamable supports Unity versions 2021 LTS to Unity 6 and is compatible with all template types
• Beamable supports many Unity target platforms including iOS/Android on Mobile and Windows/Mac for PC

The Unity "Hub" Window
2. Setup Licensing
A Beamable license is required before completing the setup process below. Beamable cannot be downloaded, installed, or used without a license.
License Required• Sign up for Beamable today by choosing a plan! You can also contact us if you have any questions
• License confirmation includes the Beamable SDK Installer Package file required for Step 3 below
3. Setup Beamable
Now use the Beamable SDK Installer Package file to install the Beamable SDK.
| Step | Detail |
|---|---|
| 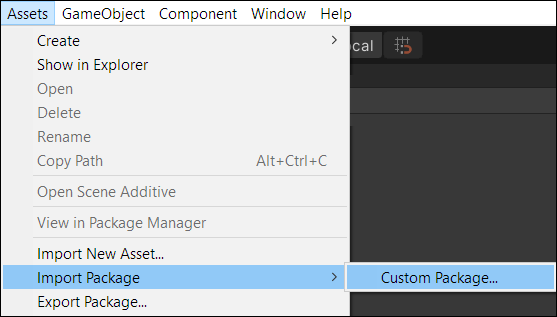 • Unity → Assets → Import Package → Custom Package |
|  • Press the "Import" button |
| 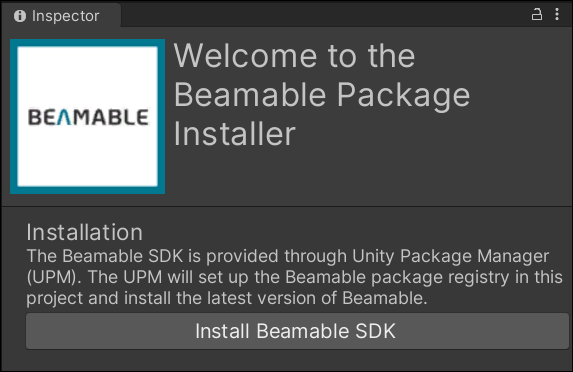 • Click to continue |
|  • Click to continue_Note: Now that the installation process is complete, the installer package is no longer needed._ |
Congratulations the Beamable SDK is now installed!
Dotnet RequiredStarting with the Unity 2.1.0 SDK, Beamable requires that you have dotnet 8.0.302 installed on your machine. If you don't, the Beamable SDK will offer a download option for you, and once you've finished installing it, you can continue through the dialog.
Usage
To open the Toolbox window, select "Unity → Window → Beamable → Open Toolbox".
Now see the Beamable "Login" Window prompts for user account registration.

The Beamable "Login" Window
| Name | Detail |
|---|---|
| Customer Alias | • Enter the name of your studio (e.g. "MyGameStudio") Note: This may contain spaces |
| Game Name | • Enter the name of your game project. Use the real name of the game if possible (e.g. "My Game Name") Note: This may contain spaces |
• Enter a valid email address. This is important for notifications about the service Note: This may contain numbers, letter, and symbols | |
| Password | • Enter a secure password |
| Confirm Password | • Confirm you typed it correctly |
| Agree To Terms | • Beamable is available free for development, but you agree to a commercial agreement when you ship your game |
| Create Customer | • Click to continue |
| Open The Library |
|
Verify Success
As an optional step, verify that everything is properly setup. Display the current player’s PlayerId on-screen and in the Unity Console Window.
| Step | Detail |
|---|---|
| • Unity → File → New Scene |
| • Unity → Beam Button → Open Beam Library |
| • Add this prefab to your scene |
| • Unity → Edit→ Play |
| • Press the "~" key |
| • Type "dbid" into the in-game input field and submit |
|
PlayerId• Beamable will generate an anonymous account PlayerId for a player when the project is run. Stopping and restarting the project will persist the player account.
• Want to track player accounts across multiple games? Easy. Add the Account Management Flow - Prefab and Beamable will take care of the rest.
GotchasHere are hints to help explain some of the trickier concepts:
• Sometimes copy/paste operations into Beamable text fields can carry hidden characters. If you are getting an error with copy/paste, try to manually type the desired value
• If there are still any issues, restarting Unity may help. Otherwise, please contact us
CLI Dependency
As of 2.0+, the Beamable SDK will automatically install the Beam CLI into your Unity project. You should expect to see a .beamable folder and a .configfolder in your Unity project's file structure. The .beamable folder contains Beamable specific information about your project, and the .config folder is a special dotnet folder that defines the version of the Beam CLI. If you are using source-control, both of these folders should be committed.
The .config folder has a file called dotnet-tools.json which specifies the version of the Beam CLI being used by the Beamable Unity SDK. By default, the Beamable SDK will maintain this number, and you should not edit it by hand.
User Beware: Changing the CLI version may cause issues.Starting in SDK 3.0, you may disable the SDK's explicit control of the
dotnet-tools.jsonby enabling theBeamable/Editor/AdvancedCli/Disable Version Requirementsetting in Unity's Project Settings window. If you do this, please understand that the Beamable SDK may stop functioning, as it is trying to use an unplanned version.
CLI Version History
As new versions of the Beamable SDK are released, they depend on different Beam CLI versions. This table shows which versions of the Beamable SDK depend on what CLI versions.
| SDK Version | CLI Version |
|---|---|
| 3.1 | 5.4 |
| 3.0 | 5.3 |
| 2.4.3 | 4.3.4 |
Updated 8 months ago