Microservices - Guide
Create and deploy server-authoritative C# [CLCP-Microservices-02]
<a class="link normal" href="/docs/microservices-custom-content" style={{textDecoration: 'none'}}>Content</a>
<a class="link normal" href="/docs/microservices-dlls" style={{textDecoration: 'none'}}>DLLs</a>
<a class="link normal" href="/docs/microservices-debugging" style={{textDecoration: 'none'}}>Debugging</a>
<a class="link normal" href="/docs/microservices-distributing" style={{textDecoration: 'none'}}>Distributing</a>
<a class="link normal" href="/docs/microservices-tool-window" style={{textDecoration: 'none'}}>Tool Window</a>The purpose of this guide is for game makers to create and deploy server-authoritative C# functionality within their games with Beamable Microservices.
This guide includes everything needed to use the Microservices feature in the "Beamable SDK for Unity". Or watch this video.
Related Feature• More details are covered in related feature page(s). See Microservices for more info.
Game Maker User Experience
There are 3 major parts to Microservice setup process. During development, the game maker's user experience is as follows:
Example
In this AddMyValues() example a new c# server-side Microservice is created and exposes a method to be called by any c# client-side scope.
The source-code for both server-side and client-side sits local in your Unity project for efficiency and ease-of-use.
Creating a Microservice
namespace Beamable.Examples.Features.Microservices
{
   [Microservice("MyMathMicroservice")]
   public class MyMathMicroservice : Microservice
   {
      [ClientCallable]
      public int AddMyValues(int a, int b)
      {
         return a + b;
      }
   }
}
Calling a Microservice
namespace Beamable.Examples.Features.Microservices
{
    public class MyMathMicroserviceExample : MonoBehaviour
    {
        private MyMathMicroserviceClient  _myMathMicroserviceClient;

        protected async void Start()
        {
            var beamContext = BeamContext.Default;
            await beamContext.OnReady;

            Debug.Log($"beamContext.PlayerId = {beamContext.PlayerId}");

            _myMathMicroserviceClient = new MyMathMicroserviceClient();

            int myValues = await _myMathMicroserviceClient.AddMyValues(10, 5);

            Debug.Log ($"AddMyValues() Result = {myValues}");
        }
    }
}
The following steps will demonstrate how to setup that example code in a real-world project.
Getting Started With Beamable Microservices
Follow these steps to get started:
Beamable Microservices uses the industry standard Docker technology. Beamable handles all coordination and configuration.
See Microservices (Beamable & Docker) for more info.
Beamable's Docker Setup
- Hosts the client Microservices environment and hides complexity of .Net core
- Hosts the server Microservices environment
Order of Execution
- Game maker changes C# code
- Unity recompiles
- Beamable synchronizes Client <-> Server, only if needed
Step 1. Setup Docker
| Name | Detail |
|---|---|
| • Visit Docker.com Note: You may skip the Docker official tutorial |
| • Window: Press Windows+R to open the “Run” box. Type cmd and then click “OK”.• Mac: Open the Applications folder, then open Utilities and double-click on Terminal, or press Command+Spacebar to launch Spotlight and type Terminal |
| • Type docker ps |
| 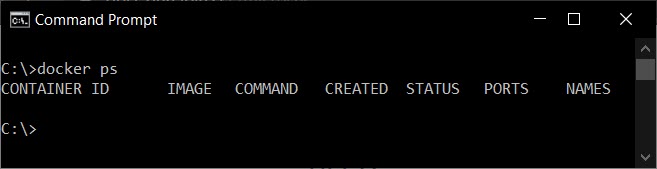 |
Step 2. Create Microservice
By design, creating Microservice C# server-code is as straight-forward as creating any traditional C# client-code. Let's take a look at an example.
Here is a traditional C# method.
public int AddMyValues(int a, int b)
{
  return a + b;
}
And here is the equivalent C# Microservice method.
[ClientCallable]
public int AddMyValues(int a, int b)
{
  return a + b;
}
Windows UsersRemember that the maximum File Path/Name size in Windows is 255 characters. Due to that, we recommend you keep your projects in a folder close to the root (and avoid unnecessarily long Micro Service names) to avoid any issues.
For some more context, as part of the Microservice building process we generate a file structure in your Unity's Temp folder. This can lead to a pretty deep file path hierarchy.
| Name | Detail |
|---|---|
| • Unity → Window → Beamable → Open Microservices Manager |
| • Unity → Window → Beamable → Create New Microservice 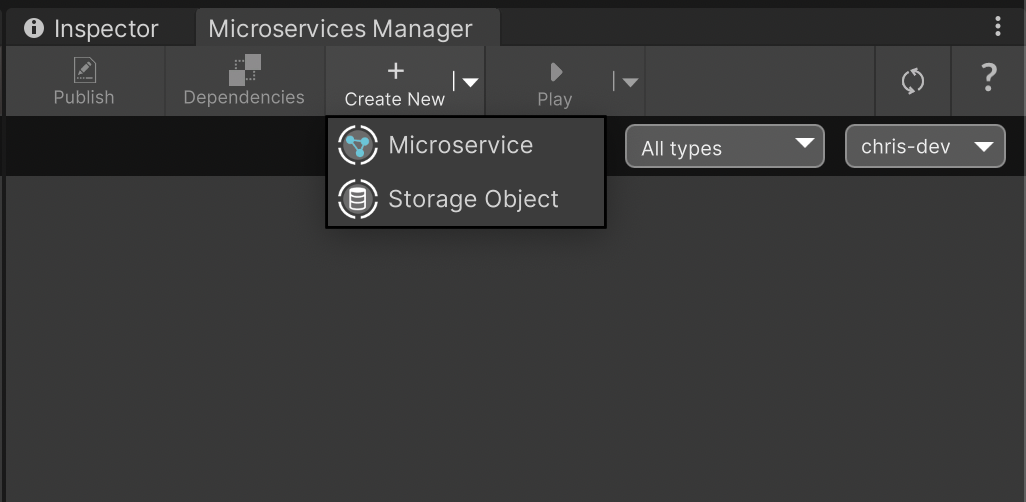 • Populate all form fields |
| [ClientCallable]public int AddMyValues(int a, int b){return a + b;} |
|  • See Beamable Microservice Manager Window • See Beamable Microservice Manager Window |
| • Unity → Edit → Play Note: Verify that the code properly functions. This varies depending on the specifics of the game logic |
| • Unity → Edit → Stop |
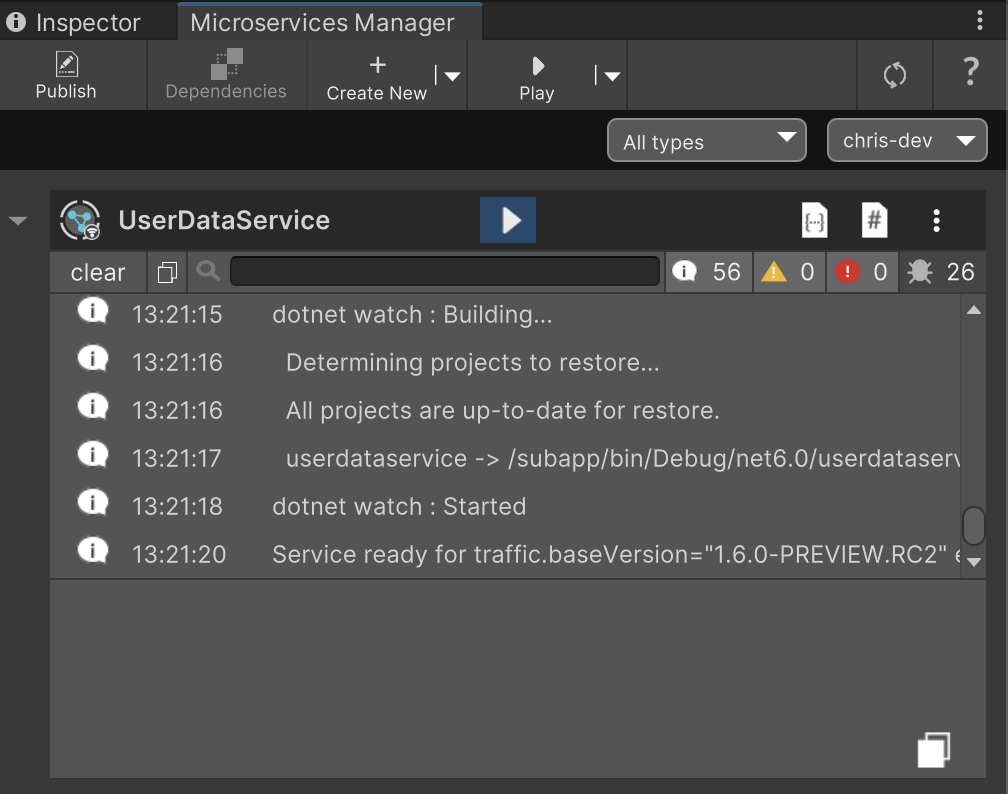
With each newly created Microservice, there is auto-generated code. This serves as a working template for the game maker, who will write the actual implementation.
Hot ReloadIn Beamable versions 1.1 and newer, microservices only need to be started once. This also applies to the microservice's generated documentation (Microservice ⋮ → Local → View Documentation). The hot-reload functionality can be disabled from the Microservice Configuration's "Enable Hot Module Reload" option.
Example
Beamable SDK Examples• The following example code is available for download at GitHub.com/Beamable_Microservices_Examples
In this example, two values will be added together and returned.
using Beamable.Server;

namespace Beamable.Examples.Features.Microservices.MyMathMicroserviceExample
{
   [Microservice("MyMathMicroservice")]
   public class MyMathMicroservice : Microservice
   {
      /// <summary>
      /// Add 2 integers and return the result.
      /// </summary>
      /// <param name="a">The first value to add</param>
      /// <param name="b">The second value to add</param>
      /// <returns>Returns the sum of the values</returns>
      [ClientCallable]
      public int AddMyValues(int a, int b)
      {
         return a + b;
      }
   }
}
Best PracticesThese hints make efficent use of concepts and workflows.
• Enable Autorun of Microservices - Click the "Autorun" Button. This will start the service in Unity's PlayMode and stop the service in Unity's EditMode
Step 3. Call Microservice
By design, calling a Microservice C# server-code is as straight-forward as calling any traditional C# client-code. Choose a location in existing C# client-code, or create a new class. Then call the Microservice as shown here.
| Name | Detail |
|---|---|
| • Unity → Assets → Create → C# Script |
| The syntax will vary depending on the Microservice Note: Avoid passing parameters with type references to any |
Example
Beamable SDK Examples• The following example code is available for download at GitHub.com/Beamable_Microservices_Examples
In this example, the Microservice is created, called, and the result is logged out to the Unity Console Window.
using UnityEngine;
using Beamable.Server.Clients;

namespace Beamable.Examples.Features.Microservices.MyMathMicroserviceExample
{
    /// <summary>
    /// Demonstrates <see cref="Microservices"/>.
    /// </summary>
    public class MyMathMicroserviceExample : MonoBehaviour
    {
        //  Properties  -----------------------------------

        //  Fields  ---------------------------------------
        private MyMathMicroserviceClient  _myMathMicroserviceClient;

        //  Unity Methods  --------------------------------

        protected void Start()
        {
            Debug.Log("Start() Instructions...\n" +
            "* Complete docker setup per https://docs.beamable.com/docs/microservices-feature\n" +
            "* Start the server per https://docs.beamable.com/docs/microservices-feature\n" +
            "* Play This Scene\n" +
            "* Enjoy!\n\n\n");

            SetupBeamable();
        }

        //  Methods  --------------------------------------
        private async void SetupBeamable()
        {
            var beamContext = BeamContext.Default;
            await beamContext.OnReady;

            Debug.Log($"beamContext.PlayerId = {beamContext.PlayerId}");

            _myMathMicroserviceClient = new MyMathMicroserviceClient();

            // #1 - Call Microservice with (10, 5)
            int result = await _myMathMicroserviceClient.AddMyValues(10, 5);
            bool isSuccess = result == 15;

            // #2 - Result = 15
            Debug.Log ($"AddMyValues() Result = {result}, Success={isSuccess}");
        }
    }
}
Advanced
This section contains any advanced configuration options and workflows.
Designing Microservices
Optionally, the Microservice can take Beamable content as input and pass Beamable player state as output. This is a suggested workflow for many game designs.
See Microservices (Designing) for more info.
Debugging Microservices
Development of Beamable Microservices within the Unity client is straight-forward and transparent. It is the ideal environment for development including debugging tools.
See Microservices (Debugging) for more info.
Deploying Microservices
During development, the Microservice is run locally within a developer-specific sandbox. When ready, the game maker can promote/deploy the Microservice to production.
See Microservices (Deploying) for more info.
Microservice Serialization
See Microservices (Serialization) for more info.
Discussion
Questions? Comments? Join the discussion in the Beamable Ask A Question Forum!
GotchasHere are hints to help explain some of the trickier concepts:
- Unlike many Beamable features, Microservices does not require a specific Beamable Feature Prefab to be used.
- Within the Microservice method implementation, avoid any references to
UnityEngineandUnityEditornamespaces- For parameters passed to a Microservice method, avoid any references to
UnityEngineandUnityEditornamespaces
Updated 8 months ago