Theme Manager
Allow game maker to customize appearance of UI [DVTL-UTW-06]
This page includes everything needed to use this tool window with the "Beamable SDK for Unity". Or watch this video.
The purpose of this Tool Window is to allow the game maker to customize the appearance of Beamable UI. This includes complete control over colors, fonts, sounds, and more!
Related Guides
A common use case for the tool window is covered in the guides.
- See Skinning Account Management Flow for more info
The User Interface
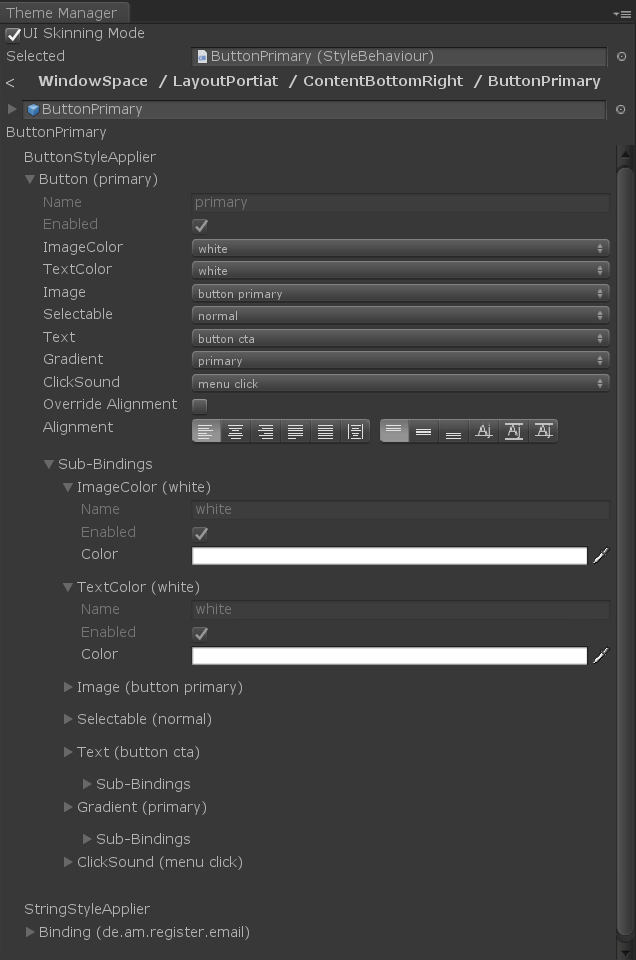
Here is the user interface of the Beamable "Theme Manager" tool window.

The Beamable "Theme Manager"
Beamable High-Level Theme Concepts
For simplicity, some Beamable data structures may be omitted from this diagram.
Steps
Follow these steps to get started:
| Step | Detail |
|---|---|
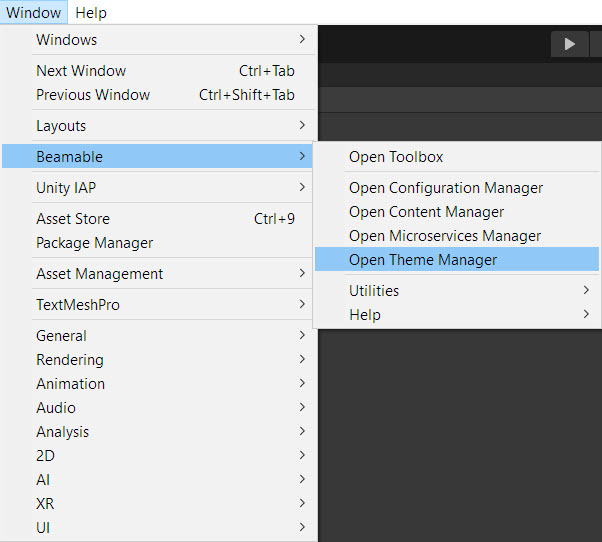
| 1. Open the "Theme Manager" Window | • Unity → Window → Beamable → Open Theme Manager |
Here is the "Beamable" menu as seen in Unity:

The “Beamable” Menu
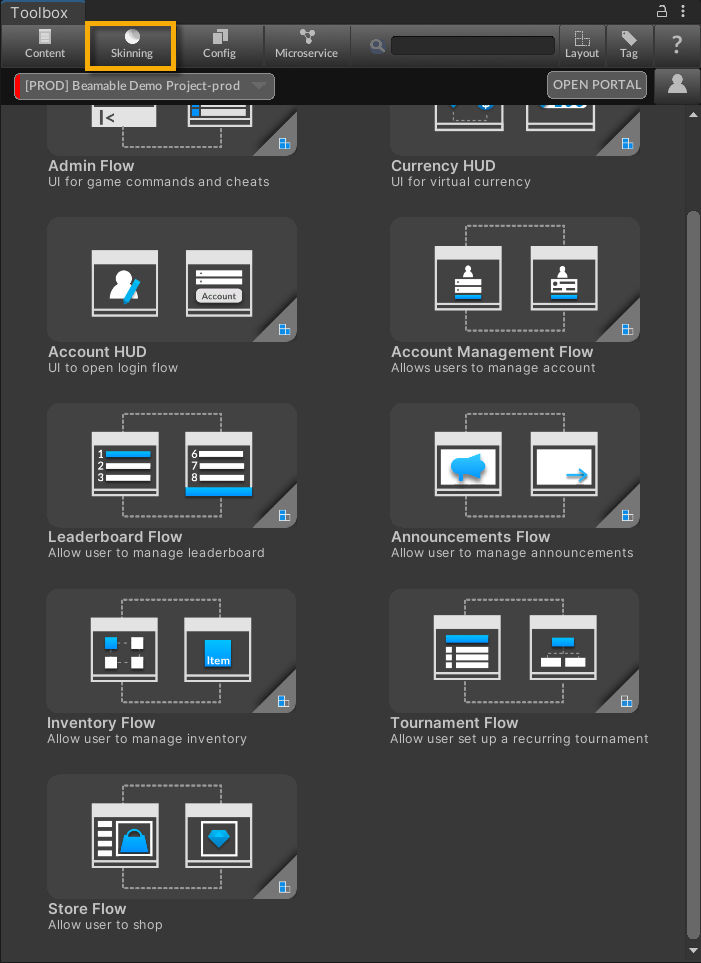
Or, click the "Skinning" Button in the Beamable Toolbox Window

The "Skinning" Button in the Beamable Toolbox Window
Detail
The steps above open the Beamable "Theme Manager" Window.
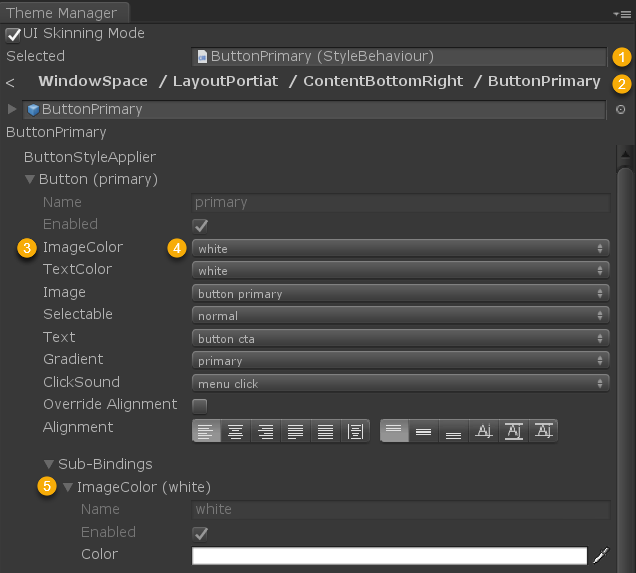
The following table and image refer provide more info.
| Name | Detail |
|---|---|
| 1. The Skinnable Object being styled | This is selected in the Unity Hierarchy Window and has a Component of type StyleBehaviour |
| 2. Path to the Skinnable Object | This is clickable to aid navigation |
| 3. Style Property Name | Of type string |
| 4. Style Property Value | This is either an absolute value (of type string, color, int, float, etc...) or a binded reference to another absolute value. |
| 5. Sub-Binding | This is a _reusable _style property |

The Beamable "Theme Manager" in detail
Advanced
This section contains any advanced configuration options and workflows.
Create a Consistent Look
Beamable's Skinning feature allows game makers create a consistent look across multiple game titles.
Here is the process for a fictitious company called "Animals Interactive" to create a consistent look across two of its games; "Dog Game" 🐕 and "Cat Game" 🐈.
| Step | Detail |
|---|---|
| 1. Create a Theme strategy | • Customize the look within the "Dog Game" game project using Beamable's Theme Manager • Keep in mind which of those looks will be game-specific and which will be reused across other games |
| 2. Create the parent theme | Within the "Dog Game" game project... • Name the current theme "AnimalsInteractiveTheme" |
| 3. Create the first child theme | Within the "Dog Game" game project... • Create a child theme from "AnimalsInteractiveTheme" called "DogGameTheme" • Set the active theme to "DogGameTheme" |
| 4. Import the parent theme | • Copy the file from "Dog Game" into "Cat Game" |
| 5. Create the second child theme | Inside the "Cat Game" game project... • Create a child theme from "AnimalsInteractiveTheme" called "CatGameTheme" • Set the active theme to "CatGameTheme" Result: Now the 2 games can be styled individually while sharing the key similarities of the parent theme |
Gotchas
Here are hints to help explain some of the trickier concepts:
• Making a change to a style (e.g. ButtonPrimary) will change every skinnable object using that style throughout your game
• The Theme Manager system does not use Unity'sAddressables
• AStyleBehaviourComponent can be found on each skinnable object. It is not recommended to edit this Component or to manually add it to any UnityGameObject
FAQ
Here are highlights from the Beamable FAQ: See FAQ for more info.
• Skinning
Updated about 1 year ago
